Showing posts with label Instant Pot recipes. Show all posts

Monday, January 6, 2020

BBQ Pork Sandwiches

Every year about this time, I hit an eating crisis. I think we all do. We're tired of "special" meals and fancy foods, holiday goodies and leftover ham.

Okay, maybe it isn't a crisis, but it's a signal that it's time for a change. For me, that means scrounging in the bottom of the freezer to see what's hanging around from the old days - i.e. pre-Thanksgiving meals - and I found something great for supper the other night!


Our grocery store still has a meat department where you can special order certain cuts and select a special steak, pork chop, or chicken quarter from the display case. And what happens to the meat in the display that doesn't sell?

It becomes a bargain hunter's dream come true!

This meat isn't dated or in bad shape - it just isn't as fresh as the meat they're filling the displays with the next day. So they package it in large bundles and sell it at a steal of a price. We usually get the bundle that includes thin-cut pork chops and beef round steaks, a few seasoned chicken leg quarters and some chicken breasts.

We bring it home and I freeze it to use later...like the first weekend of January!

On Saturday I sorted through the things at the bottom of the freezer and found two of those packages of pork chops. Perfect for quick BBQ Pork Sandwiches!

These are super easy.

First, I cooked the pork until it was fall-apart tender. Even starting from frozen, this step was a snap in my Instant Pot.


In your crock pot or oven, or on top of the stove, cook it low and slow for several hours. Be sure to keep it moist if you're using the stove or oven!

After the pork was cooked, I diced some onions and threw them in, then added some garlic powder (about a teaspoon) and a generous amount of barbecue sauce (any brand will do - pick your favorite.) And add whatever else sounds good. Worcestershire sauce is always a good choice.

I pressure-cooked everything on high for another ten minutes, then let the pot do a natural pressure release while I got the buns ready.

Another item I stock up on during pre-Christmas sales are these Sister Schubert's rolls. I baked off a few for our sandwiches.

After the pork had been releasing pressure naturally for ten minutes, I did a quick release to bring the pot down to normal so I could open it. I gave it a good stir (to mix in all the ingredients and break up the pork into bitsy pieces) and it was ready to serve.


A great simple meal for the two of us, with leftovers for lunch sometime this week!

And even though it's the first weekend of the year, our weather has been mild. Yesterday afternoon was beautiful, so we drove up to the Mt. Rushmore area and went for a short saunter with Jack.


The view was beautiful no matter which direction we looked.


And Jack had a wonderful time. Do you know how many SMELLS there are in the forest? And he sniffed every single one. :-)


Enjoy your New Year and life getting back to normal!


Jan Drexler lives in the Black Hills of South Dakota with her husband and growing family. When she isn't writing, she loves hiking in the Hills or satisfying her cross stitch addiction.

You can find Jan on Facebook, Jan Drexler, author, or her website, Jan Drexler.com


Friday, October 25, 2019

Frozen Fish in the Instant Pot

Missy Tippens

Hi. My name is Missy, and I'm a chronic forgot-to-plan-dinner-a-holic. I rarely have all the ingredients needed. And I never seem to plan well enough ahead to thaw meats out ahead of time.

So you can imagine how excited I was to hear that you could cook frozen meat in the Instant Pot! I ordered mine back when they first came out several years ago. It's been a lifesaver!

Earlier this week, I needed dinner but had not been to the grocery recently. So that meant I had to work with what was in the freezer. Which included a package of frozen cod. So I went on a Google search and came up with this...

Instant Pot Italian Fish (from frozen, Whole30) at InstantPotEats.com

Check out the full recipe at the link above. But here's what I did...

I put the frozen fish in the IP.
Then I topped with:
Olive oil (I drizzled a couple of TBS over it)
1/4 cup water
sliced calamata olives
capers
a chopped fresh tomato
chopped roasted red pepper (from a jar)
a little salt (not much because of the olives and capers!)
(garlic was mentioned in the blog post and is in my photo, but wasn't in the actual recipe so I didn't use it)


I lifted the pieces of fish up to let the liquids and some of the other chopped items get underneath and coat the fish.


Then I closed it and set it on manual, high, for 4 minutes.

I let it naturally release for about 8 minutes, then did a quick release.

It turned out very tasty! It seemed a little overcooked for delicate cod. Maybe a firmer fish would work better. But in a pinch, it was a nice, quick dinner!


www.missytippens.com
Friday, July 26, 2019

Chili in July?!

Missy Tippens

My daughter and I worked at Starbucks yesterday and didn't get home until after 5 pm. We had a pack of chicken breasts and needed to make something quickly (and felt too tired to work very hard on it). I wanted to do my favorite, quick and easy chicken parmesan. However, my daughter has gotten burned out on it since I make it so often.

So then it hit me... it's hot out, but I think I sure would enjoy my favorite white chicken chili made in the Instant Pot. I've shared it here before so thought I would post it again. I was surprised how much I could enjoy it on a Georgia summer day! It never goes out of style. :) So, drum roll... here's a winter favorite in July! (a re-post of my fall 2018 recipe).


I was on a retreat this past weekend (will share photos from that soon) and they shared this recipe. I decided to make it last night.

Go here to find the recipe (at Natasha's Kitchen blog).

Of course I had modify it. I didn't have all the ingredients. (Surprise!! LOL) I know, I know. I never seem prepared for cooking. I guess it's a personality flaw. :)


I put in two large, mostly-frozen chicken breasts. Then I topped with the black beans, white beans, canned corn, green chilis (because I realized the can of Rotel had expired in 2017!), a can of diced roasted tomatoes, spices (because I didn't have the Ranch dressing mix), And some water with chicken seasoning (because I didn't have chicken broth and decided not to use the vegetable broth). And then I put the chunks of cream cheese on top--using fat-free to fit better in my Weight Watcher's points (with a little fear that it wouldn't be as good).

I forgot to take a photo! But it looked so tasty with all the bright colors of corn and tomatoes and beans.

I put it on high for 23 minutes (recipe calls for 20 but I assumed that was for thawed chicken breasts). I used natural release--well, planned to. I admit I was impatient and put a dish towel over the valve and released it after about 10 minutes.


I shredded the chicken, put it back in the pot and served. Some of you may need to close your eyes, but I also sprinkled on some dried cilantro. :) Using regular cream cheese would have made it creamier, but it was still excellent.


It was yummy and perfect for a cool rainy day!

www.missytippens.com

Friday, May 3, 2019

Simple and (Sort of) Quick

Missy Tippens

I'm just sharing a good ol' stand by today. Something made a little easier by my Instant Pot. I thought to make this because we had a bag of frozen leftover ham that was months old that my husband wanted to throw away. I didn't want to waste it since it didn't have freezer burn, so decided to use it to flavor one of my favorite things...

Pinto beans!

Good protein, good fiber. And inexpensive.

I took a 1 pound bag of dried pintos and rinsed them.


Because I was using the IP, I didn't need to soak them. However, they weren't as tender as I would have liked, even after reheating them the next day. So next time I'll try to remember to let them soak overnight to see if that makes a difference.

I added 6 cups of water because I like mine soupy. But I think you need to add at least 4 cups.

Then I added some olive oil, chopped onion, chopped ham, and a bit of vinegar.


I cooked them on manual, high setting, for 45 minutes with a natural (not quick) release.

They turned out tasty! I ate them several times leftover as well. And I didn't waste that ham! :)

(I also had a good laugh as my husband very tentatively ate them, asking me to promise him the ham wouldn't make him sick.) LOL

P.S. We were both FINE. :)

www.missytippens.com

Monday, March 11, 2019

Cheesy Cream of Broccoli Soup

In our part of the world, winter is still going strong.


"File photo" Why take another photo
when you already have enough snow pictures? LOL!

On Friday night through Saturday morning, a winter storm came through. Snow on top of snow and blustery winds along with it.

That means that it's still soup weather!!! We have soup so often at our house that one of the checkout clerks at Walmart has started asking what kind we're making this time. (Maybe it's time to choose another lane at the grocery store...)

Anyway, last week I had some fresh broccoli, so I made one of my favorites....

Cheesy Cream of Broccoli Soup

(makes about 4 large servings)
ingredients:

4 cups fresh broccoli, steamed and chopped (or a 16 ounce bag frozen broccoli florets, cooked)
1/2 cup finely chopped carrots
1/4 cup finely chopped onion
1 clove garlic, minced (or 1 teaspoon garlic powder)
1/2 teaspoon chipotle chili powder or chili powder (don't worry - it will be flavorful rather than spicy)
1/4 cup butter
4 cups chicken or vegetable broth (I like this soup better with the vegetable broth)
1 cup heavy cream (you can use a can of condensed milk for a lower fat version)
2 cups shredded cheese, or 8 ounces Velveeta, cubed

A super easy way to steam fresh broccoli is to use your Instant Pot! Use a steamer basket for this.


Put one cup of water in your Instant Pot, then insert your steamer basket. Put the broccoli in, then seal the lid. Set your IP to pressure cook on high for zero minutes. That's right. Zero. The broccoli steams while the IP is coming up to pressure. Use quick pressure release and immediately rinse the broccoli in cool water so that it stops cooking. That's it!

Once your broccoli is cooked, chop it into small pieces for your soup.


Meanwhile, melt the butter in your soup pot (I just used my Instant Pot's saute function since I had already used the pot to steam the broccoli.) Once it's melted, add the chopped carrots, onion, chili powder, and garlic. Cook and stir until the carrots have softened, about 5 to 10 minutes.


Add the broccoli and broth, then bring the soup to a boil. Add the cream and reduce the heat. Let it continue to cook without boiling until hot.

Or if you aren't quite ready to eat yet, let your soup pan sit on the stove on low to keep the soup warm, or switch your Instant Pot to the slow cook function.

About 10 minutes before serving, stir in the cheese until it's melted.


This soup is warm, hearty, and full of flavor!


Even though the weather is still wintery, I know my soup-making days are numbered until fall. I am SO looking forward to spring!


How is winter doing where you are? Is it still holding on, or is it long gone?


Jan Drexler lives in the Black Hills of South Dakota with her husband and growing family. When she isn't writing, she loves hiking in the Hills or satisfying her cross stitch addiction.

You can find Jan on Facebook, Jan Drexler, author, or her website, Jan Drexler.com.

Friday, January 11, 2019

Instant Pot Potato Soup

Missy Tippens

I made some really tasty soup this week--but of course didn't think to take photos until the very end. However, I still want to share the recipe!

I used this recipe as my guide-- from the Delish website. Click here.

But because of some dietary restrictions from one of our family members, I made little adjustments. Here's how I did our version...

In my Instant Pot, I used the sauté setting and cooked bacon (about 3 slices) and about half a bell pepper (I used an orange pepper). Then I added vegetable broth (I thought I was opening a box of chicken broth!). So since I didn't have the chicken flavor (and couldn't use bouillon cubes), I added some McCormick poultry seasoning. I also added some Italian seasoning since I couldn't use onion and garlic.

I peeled and cubed 6 potatoes and added them. Then I closed the Instant Pot and set it on high for 8 minutes.

Once it was done, I let it vent naturally for about 10 minutes and then released the pressure.

I set it back to the sauté setting and added the cornstarch slurry. I used lactose-free milk (no cream). It said to stir constantly during this phase so I was careful to do that. It thickened up nicely.

Also, it needed salt added!

The recipe recommends using an immersion blender but I don't have one (and don't plan to get one because of I know of two people who have been injured using them). So I used my hamburger/potato masher and it did a fine job! I don't mind some pieces of potato in mine.

We really enjoyed it! I did snap a photo of my daughter's bowl before it was gone. :) Not too pretty but so good. And it would have been great with shredded cheddar and some bacon on top!


www.missytippens.com

Monday, December 31, 2018

Potato and Ham Soup

A quick search on the Yankee Belle Cafe blog will show you that we love soups around here. Chowders, Stews, Chilies, Soups... If it's cold and snowy outside (or even just cloudy and cool), we're getting out our Crock Pots, Instant Pots, or Stew Pots and whipping up some comfort food.

As you can see by the title of this post, today is no exception!

After a very mild week or so before Christmas, we finally got the winter weather we've been expecting. On Wednesday, a storm blew through bringing high winds, c-c-cold weather, and a few inches of snow to our area. East of us, in "East River," they got the real blizzard. 10" - 12" of snow, plus the cold and high winds.


One of my favorite pictures from last winter - we haven't been up
to the Hills since October!


At our house, cold weather means a fire in the wood stove and soup. We had some ham and potatoes, so I decided to try this recipe for my Instant Pot (no worries - you can easily fix it in your slow cooker or on top of the stove.)

Potato and Ham Soup
serves 8 - 10


ingredients:

6 - 8 medium russet or Yukon gold potatoes, peeled and cubed (about 8 cups)
4 stalks celery, chopped (about 2 cups)
4 carrots, chopped (about 2 cups)
1 cup frozen or canned corn (optional)
2 garlic cloves, minced
2 Tablespoons finely minced onion
1 pound ham, cubed
3 cups broth - ham, chicken, or vegetable
1 teaspoon rosemary
salt and pepper to taste

To add at the end of the cooking time: 2 cups whole milk or 1 cup half and half, 1 cup milk. And if you like your soup a bit thick and "chowdery," whisk a quarter cup of flour into the milk before adding it in.

*note: if you're using a slow cooker, add the rosemary and salt and pepper at the end of the cooking time.

Put the potatoes, vegetable, garlic, onion, ham, and broth in your pot and stir to combine.

Instant Pot: Lock the lid and set to cook on high pressure for 10 minutes (allow 30 minutes or so for the pot to come to pressure.) Let the pressure release naturally (about 15-20 minutes.) Switch the pot to the high slow cooker setting, then add the milk. Stir to combine and let it cook for another 10 minutes.

Slow Cooker: Cook on low for 8-10 hours, or high for 6 hours. Add the rosemary, salt, pepper, and milk, and stir to combine. Cook on high for another 30 minutes.

Stove top: Bring to a boil then reduce the heat to simmer and let it cook for at least an hour. Add the milk and bring back to temperature (close to boiling, but not quite.)

That's it! Serve with your favorite toppings and some good bread, and I guarantee you'll feel warm all night. :-)

Are soups a part of your winter menu like they are for me?


Jan Drexler lives in the Black Hills of South Dakota with her husband and growing family. When she isn't writing, she loves hiking in the Hills or satisfying her cross stitch addiction.

You can find Jan on Facebook, Jan Drexler, author, or her website, Jan Drexler.com.

Friday, November 9, 2018

White Chicken Chili (Instant Pot!)

I was on a retreat this past weekend (will share photos from that soon) and they shared this recipe. I decided to make it last night.

Go here to find the recipe (at Natasha's Kitchen blog).

Of course I had modify it. I didn't have all the ingredients. (Surprise!! LOL) I know, I know. I never seem prepared for cooking. I guess it's a personality flaw. :)


I put in two large, mostly-frozen chicken breasts. Then I topped with the black beans, white beans, canned corn, green chilis (because I realized the can of Rotel had expired in 2017!), a can of diced roasted tomatoes, spices (because I didn't have the Ranch dressing mix), And some water with chicken seasoning (because I didn't have chicken broth and decided not to use the vegetable broth). And then I put the chunks of cream cheese on top--using fat-free to fit better in my Weight Watcher's points (with a little fear that it wouldn't be as good).

I forgot to take a photo! But it looked so tasty with all the bright colors of corn and tomatoes and beans.

I put it on high for 23 minutes (recipe calls for 20 but I assumed that was for thawed chicken breasts). I used natural release--well, planned to. I admit I was impatient and put a dish towel over the valve and released it after about 10 minutes.


I shredded the chicken, put it back in the pot and served. Some of you may need to close your eyes, but I also sprinkled on some dried cilantro. :) Using regular cream cheese would have made it creamier, but it was still excellent.


It was yummy and perfect for a cool rainy day!

www.missytippens.com

Monday, November 5, 2018

Beans for Chili, Cooked in the Instant Pot

Hello. My name is Jan, and I'm an Instant Pot addict.


I've shared recipes done in my Instant Pot before....

For Deviled Eggs...

...and for Soups like this one...and this one... But most of all, for Chili!

A few of us were talking about our Instant Pots recently, and I realized that I had used it six times in one week.

I think this purchase was worth while!

On Saturday I cooked beans for the chili I planned to make in the slow-cooker on Sunday morning. I like making the beans ahead of time so that I know they're all set for the chili and won't turn out half-cooked and crunchy.

Is there anything worse than crunchy beans? (Unless they're dry-roasted, of course!)


One thing I learned when we moved to the Black Hills was that beans, rice, and all baked goods cook differently at higher altitudes. I had spent a lifetime - more than 50 years - ignoring those "high-altitude" directions. Suddenly, now that we live at 3500 feet, they are important!

Views like this one on the Needle's Highway in
Custer State Park makes cooking
adjustments worth while!


So, I've learned a lot about cooking beans in the last seven years. (For instance, did you know that older beans (ones you've been storing for three or four years) take longer to cook than fresher beans? And did you know that high altitudes can make it nearly impossible to cook beans the way you've always done it?)

The last time I shared a recipe using beans, I just listed "cooked beans" in the ingredients list. Today I'm going to help you actually cook those beans.

I know you're asking yourself why you would cook dry beans when you can just buy a can of beans at the grocery store.... I used to ask myself the same question. Especially after several bean-cooking failures. In fact, a few years ago, I gave up on dry beans. It was just too much work and too much time to soak and cook, and cook, and cook those beans!

Until I bought my Instant Pot.

Now I gleefully cook dry beans in an hour or so, and save big bucks at the grocery store! (Compare the prices of canned beans vs. dry beans the next time you're at the store and you'll see what I mean.)

Beans for Chili in the Instant Pot

ingredients:

2 cups dry beans (I use small red beans for chili, but you could use kidney beans or pintos.)
2 Tablespoons apple cider vinegar
at least 6 cups water, maybe 8

Rinse the beans and pick through them. Sometimes stones are missed in the sorting process at the bean bagging facility, and these guys haven't been washed since the last rainstorm when they were in the field.

Put the beans, vinegar, and water in your Instant Pot. (Don't worry about the vinegar adding a sour flavor to your chili or whatever you're making - you're going to be rinsing these beans before you cook them with your other ingredients.)

Cook on high pressure until the beans are done.

Don't you hate it when a recipe gives you those directions????

But in this case, it's necessary. I cook 2 cups of small red beans for about 40 minutes, but at your elevation they might only need 25 minutes. Or 30. You just have to experiment.

After the cooking time is over, let the pressure release naturally. Open the pot and check the beans. Fish some out of the liquid with a spoon and blow on them lightly. Does the skin on the surface of the bean crack? Try squeezing one - is it soft? Then they're done.

But if they aren't done yet, go ahead and seal the pot again, cook for an additional 10 to 20 minutes (depending on how crunchy they were,) and let the pot go through the cycle, including the natural pressure release.

Once the beans are done to your liking, dump them into your colander/strainer and rinse and drain those beans! Discard the water they've been cooking in, too.


Now they're ready to use in your recipe, or to store in the fridge for a day or two until you're ready to use them.

These guys are ready for Sunday's chili lunch, or I could use them in a salad. Or bean soup. Or...

What is your favorite way to use beans?


Jan Drexler lives in the Black Hills of South Dakota with her husband and growing family. When she isn't writing, she loves hiking in the Hills or satisfying her cross stitch addiction.

You can find Jan on Facebook, Jan Drexler, author, or her website, Jan Drexler.com.

Monday, May 7, 2018

Herbed Beef Stew in the Slow Cooker...or Instant Pot!

Jan here, in between deadlines. And at the same time, I'm traveling. It's a good thing writers can work while traveling, right?

I'm sharing this post from 2013 because while it's still a favorite recipe, I've updated it a bit to fix it in my counter-top pressure cooker.

I have to tell you, I love my Instant Pot. I know people gush about these things, but I use it so much that I'd rather do without my stove than this baby.


So here's a rerun of my post from 2013, with the new Instant Pot directions in red!

* * * * * * * * * *


This is my husband's favorite beef stew, and I'm so glad it is because it's quick and easy to put together.

I use my slow cooker a lot - there's nothing like being able to put a meal together in the morning while the family is getting around and off to school and work, and then be able to forget about it all day while I zone out in my writer's cave. (A habit left over from homeschooling days, when I'd zone out in academia-land...)

With the Instant Pot, I start cooking about ninety minutes before meal time.

Here's the recipe:

Herbed Beef Stew


Ingredients:

1 to 2 pounds beef - I used arm roast this time, but you can use stew beef, round steak, chuck steak...whatever is on sale or in the freezer! - cut into 1 inch cubes

1/2 cup flour
1/2 teaspoon salt
1/2 teaspoon pepper
1/2 teaspoon paprika

4 cups beef broth
1 teaspoon Worcestershire sauce
1 garlic clove
1 bay leaf
4 carrots, sliced
4 medium (or 2 humongous) potatoes, cubed
1 onion, diced

1/2 teaspoon thyme
1/2 teaspoon basil
1 teaspoon parsley
1 teaspoon marjoram

(if using fresh herbs, double the amount)

Okay, there are a lot of ingredients, but oh, they blend together so well!

Put the flour, salt, pepper and paprika in a plastic bag, or use one of these handy slow-cooker liners (I never use my slow cooker without one of these!)

Add your cubed meat and shake well until all the pieces are coated with flour. Put the meat in the slow cooker.

When you're using the Instant Pot, save the seasoned flour for the last step.

Cube your beef, then brown in a tablespoon of oil in your Instant Pot set on saute, medium heat, until only a little pink is showing. Add 1 - 2 cups of the beef broth, seal the lid, and pressure cook on high for 10 minutes. Let the pressure release naturally for at least 20 minutes.


Add all the other ingredients and stir.

After the meat is cooked, open the Instant Pot (after releasing any pressure) and add the vegetables, herbs, and 1 more cup beef broth (reserve one cup). Pressure cook on high for 5 minutes and let the pressure release naturally.

Ten minutes before serving, open the Instant Pot. Whisk the seasoned flour into the 1 cup reserved beef broth and stir into the stew. Set the pot on saute, high, and let the stew come to a boil, stirring often. Once it comes to a boil, turn the pot to slow cook, low to keep it warm until you're ready to serve it.

Cook on low for 8-10 hours, or on high for 6-8 hours.

Serve with your favorite salad or fruit and bread.

(Speedbo time: I used refrigerated crescent rolls...)


And now that supper is cooking away in the slow cooker, let's get back to writing!!!


What is your favorite quick meal in your slow cooker? Or the Instant Pot?


Jan Drexler lives in the Black Hills of South Dakota with her husband and growing family. When she isn't writing, she loves hiking in the Hills or satisfying her cross stitch addiction.

You can find Jan on Facebook, Jan Drexler, author, or her website, Jan Drexler.com.

Monday, April 2, 2018

People Treats and Dog Treats

Jan here, with a recipe that I try not to think of as a 'cheater' recipe.

Because homemade bread is a lot of work, right? At least it's supposed to be... And it takes hours of work, right? At least it's supposed to...

But I have to admit that since I found this recipe, we've had more homemade bread with our suppers than we have since my writing career started (writing=time consuming=very little bread baking). I've made it several times this winter, and it's time to share it with you.

The key is to use your Instant Pot to let the bread rise. You don't have an Instant Pot? No problem! Just let the dough rise in a warm place. It might take a little longer, but it will still be good.

It's one of my hubby's favorite treats - and perfect to eat with a bowl of homemade soup!

Whole Wheat Crusty Bread

ingredients:

2 1/4 cups whole wheat flour
1 cup all purpose flour
1/4 cup rolled oats
1/4 cup other grains or seeds of your choice (I've used millet, ground flax seed, or more oatmeal with good results every time)
1 1/2 teaspoons salt
1 Tablespoon instant yeast
1 1/2 cups room temperature - lukewarm water

baking parchment paper

In a medium bowl mix together the flours, oats, grains and/or seeds of your choice, salt and yeast. Add the water and mix well, using your hands if necessary. Turn the dough onto a floured board and knead for a few minutes, adding more flour as needed to keep it from being too sticky.

Form the dough into a ball, place it on a square of parchment paper, and put it in your Instant Pot.

Secure the Instant Pot lid, press the yogurt setting button, adjust the setting to low, then adjust the time to 4:30. When it beeps, you know the cycle has begun.

After four hours, the dough should be risen slightly. Quickly form the dough into a ball again, place it on a new sheet of parchment paper, and put it back in the Instant Pot for the remaining thirty minutes.

Meanwhile, set a 6 to 8 quart cast iron pot in your oven with the lid on. Preheat the oven to 450°.

At the end of thirty minutes, carefully remove the lid from the cast iron pot (it will be very hot). Then gently lift the bread dough from the Instant Pot, holding the parchment paper by the corners to cradle it. Set the dough in the cast iron pot, paper and all, and replace the lid.

Bake the bread in the 450° oven for 30 minutes. Then remove the lid and bake the bread for 15 minutes more.


Remove the bread from the pan and let it cool on a rack. (Remember that the pot is still very hot - if you leave the bread in it, it will continue to bake.)


Let it cool, then slice and enjoy!

And now it's time to make some treats for the dogs.

Friday was Thatcher's fifth birthday. That's a big number! A lot has happened in five years, so I decided to celebrate the occasion with homemade doggy treats.


Peanut Butter, Banana, and Oatmeal Dog Cookies

ingredients:

1 egg
1/3 cup peanut butter (preferably natural - and make sure it isn't sweetened with xylitol, which is toxic to dogs)
1 cup whole wheat flour
1/2 cup rolled oats
1 mashed banana (about 1/2 cup)

Preheat the oven to 300°.


Combine all the ingredients in a bowl until a ball forms. Add more flour if necessary to keep it from being too sticky.

Drop balls of dough onto a cookie sheet (about the size of an acorn), then flatten the balls with a fork dipped in flour.

Bake for about 15-20 minutes, or until the edges are beginning to brown.


Store most of the cookies in the freezer, keeping only enough for a day or two in a container at room temperature.


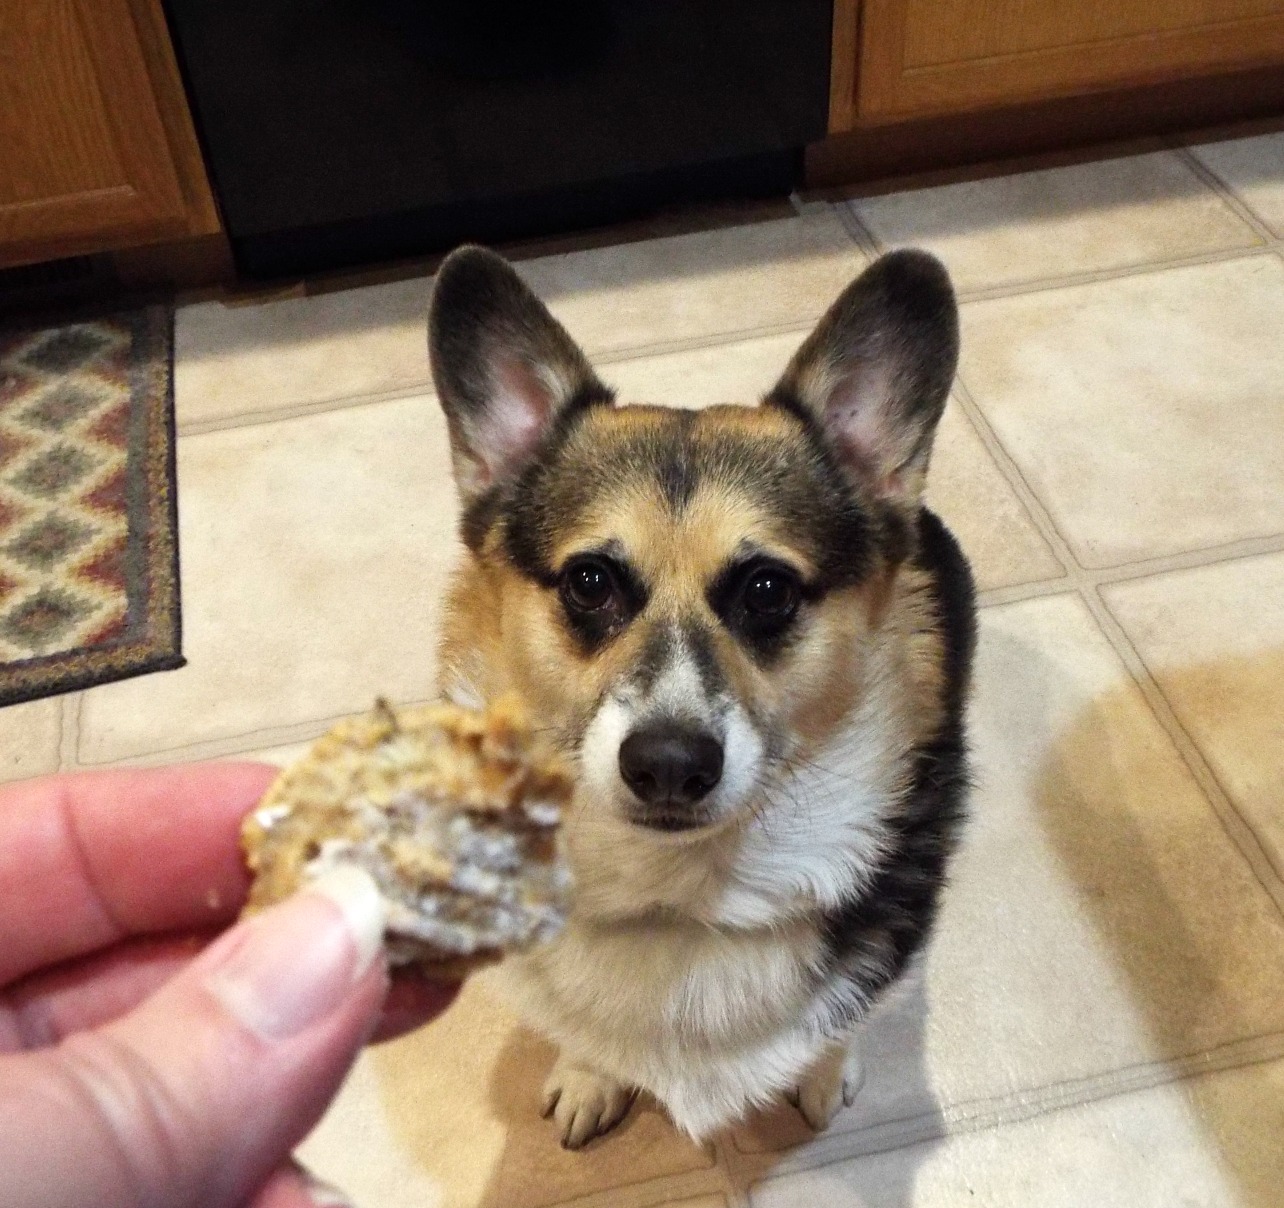
I knew Thatcher would like these cookies, but how much?

Let's try the first piece:


Yes, he's willing to try it (after all, it will fit in his mouth!)


Hmm. Pretty good.


Gimme another one! This is wild-eyed crazy good!

Then Wynter noticed what was going on...


Nom. Nom. Nom.

I didn't want to overdo a good thing, so I put most of the treats in the freezer, and left one on the counter to give to the dogs in the morning.

But all evening, Wynter wouldn't leave us alone. She paced. She whined. She barked. She moaned. Finally, she went to sleep.

Then first thing in the morning, there she was, in the kitchen, her nose pointed at the counter. She wanted that last cookie!

I think they were a hit!


Do you like to make treats for your family as much as I do?


Jan Drexler lives in the Black Hills of South Dakota with her husband and growing family. When she isn't writing, she loves hiking in the Hills or satisfying her cross stitch addiction.

You can find Jan on Facebook, Jan Drexler, author, or her website, Jan Drexler.com.