Showing posts with label sourdough starter. Show all posts

Monday, April 27, 2020

Sourdough Success

Jan here, with a hard-won recipe success!


I've been experimenting with sourdough off and on for years. Check out this post here, and this two part post here and here.  Those earlier tries met with varied degrees of success, but the disappointments out-weighed the determination to keep pursuing sourdough perfection. *sigh*

But I decided to try one more time.

Living in the country is a new thing for me. I spent my first five years living in the parsonage of a country church in central Ohio...and spent the next fifty-five years trying to get back to the open spaces I loved during my early childhood. Believe me, my memory didn't deceive me! I love living here!

A red-breasted nuthatch in our front yard.


But living in the country has its challenges, like trying to get to the grocery store when winter storms cover the roads with ice and snow. Or not being able to stop by the store to grab that one ingredient I'm missing from the recipe I want to make tonight.

And our current situation means that many, many people are discovering that the isolation we enjoy in the country has become a way of life, even in the middle of the big cities. Empty grocery store shelves have become normal. 

A simple help in times like these is sourdough. If you have some basic ingredients on hand, you can make your own bread, even in the most dire situation. It's also a good skill to learn if you like to write historical novels...


So, here's what I've learned along the journey from sourdough failure to success:

1) I've learned that sourdough isn't that hard! I had been trying to over-think it. But sourdough (unlike most baking) is more art than science.

2) I've learned that sourdough is a living organism. I'm beginning to understand why some people name their sourdough starters! Once your starter is mature (and this will take several weeks,) you learn how it communicates. It tells you when it's hungry, it tells you when it's too dry (or too wet,) and rewards you with wonderful baked goods!

3) I've learned that you can start with someone else's sourdough recipe, but every kitchen is different! Different temperatures, different native yeasts floating around, different levels of humidity.

How can you make your own sourdough starter?


Easy-peasy lemon-squeezy!

1) Start with a clean glass or plastic jar (not metal,) like a one-quart canning jar. 

2) The next ingredient is flour. I found that rye flour works best to catch the yeast floating in the air. To get my starter up and running, I used one of these bags over a two week period. 


After you've gotten past the first week or so, you will want to use bread flour. I buy mine at Sam's club (it's from a local Montana grain mill.)

But remember - easy-peasy! You can use whatever flour you have on hand...except self-rising!

3) The third ingredient is water. Some people will say to use only filtered water, or only spring water. But I use tap water with no problem.

4) The fourth ingredient is time. Your sourdough starter will be up and running after a week, but it takes several weeks to mature into your best kitchen friend.

Start your sourdough starter by mixing 1/2 cup rye flour with water. How much water? Well, that depends on a lot of things.

This starter didn't have enough water:


This one does:


I've read that the basic flour/water ratio should be 2:1. But I've found that the humidity in your kitchen makes a huge difference. We live in a semi-arid part of the country, so I use a 2:1.75 ratio - almost 1:1. As you work with your starter, you'll discover its happy place as far as that ratio is concerned.

After you mix your flour and water, cover the jar loosely and set it out of the way. In the early stages, I like to use a coffee filter held on with a rubber band. After a week or so, I just set a lid on the jar loosely.

Now comes the hard part. After your sourdough starter has spent a day fermenting on your counter, discard all but 1/2 cup and mix in another feeding of rye flour and water. Do this for five to seven days. When you run out of rye flour, start using bread flour to feed the starter.

Yes, it's painful to discard all that flour and water...but you won't always do this. For these first few days, you're making room for your baby starter to grow. If you didn't discard the extra, you'd have quarts and gallons of starter taking over your kitchen! 

Okay, maybe I'm exaggerating.

After five to seven days - or maybe longer - your starter will begin to smell fruity/sour. That means it's working!

And after it starts working, you can begin to use it!

But what if something goes wrong?

One thing that can go wrong is that your jar isn't completely clean. It might have a bit of soap residue or whatever in it, and the starter can mold rather than ferment.


This is not pretty or safe. :-( Throw it away and start over.

Another thing that can happen (and it happens often - I don't have a picture, though) is that your starter can develop a brown watery layer on top. It seems to come from nowhere! But no worries. That liquid is called "hooch," and it appears when your starter is hungry. Pour off the brown liquid, then feed your starter. You might feed it again in a few hours, just to give it a boost.

A third thing that can happen is that you might want to go out of town someday, and leave your starter behind. Or maybe you don't want to bake EVERY. SINGLE. DAY. No problem. Your starter doesn't need constant care. Just stick it in the refrigerator (to slow down the growth rate) and feed it about once a week. You can even leave it for two or three weeks, and it will survive. Just be sure to feed it and let it get some of its vigor back before you try to bake with it.

The starter you have now is still young. 

You can make bread with your immature starter, and it will turn out fine - just not as beautiful as it will be when your starter matures.


These loaves are a bit flat, but the artisan loaf I tried turned out well:


I also made these biscuits with immature starter:


But if you remember, I mentioned that one of the ingredients of a successful sourdough starter is time. It takes weeks for a new starter to mature to the point where you can consistently produce a good loaf of bread.


I figure I'm about half-way to that perfect loaf of bread.

The goal: A mature starter

This is what a mature starter looks like - bubbly with a fruity odor:


I've been working on this starter since the middle of February, so about two months.

But there is a short cut!

You can get some mature starter from a friend who uses one. Or you can buy it! One on-line source is King Arthur Flour. 

And finally, the big question: where do I find recipes?

The King Arthur Flour website is a great place to start. They even have a sourdough tutorial here. 

There are also a lot of recipes on Pinterest, or you can do an internet search.

But my favorite place for recipes is this new cookbook I bought, written by a Mennonite baker. Her website is here.


And don't forget that learning to bake bread, especially sourdough bread, takes practice. And that's the part my dear husband loves!

What do you think? Will you become a sourdough aficionado?


Jan Drexler is an author by day who is addicted to counted cross stitch and sauntering through the Hills with her dear husband and their puppies - goofy corgi Jack and growing-fast border collie Sam. You can find Jan's books and other fun things on her website: www.JanDrexler.com.


Friday, September 20, 2019

Welcome Sourdough Bread Cookbook Author Carroll Pellegrinelli!

I'd like to welcome guest Carroll Pellegrinelli today, whom I met through Debby Giusti! Carroll is sharing a recipe from her new cookbook, Starter Sourdough: The Step-by-Step Guide to Sourdough Starters that is available for pre-order now. Take it away, Carroll...


Sourdough starter is an amazing creation. It can be made from two simple ingredients, flour and water. The fermentation of sourdough extends the shelf life of bread. No one in the entire world will be able to make bread or other baked goods exactly like yours as no two sourdough starters are the same.

Want to learn more about sourdough starters and try more recipes? Order my book “Starter Sourdough – The Step-by-Step Guide to Sourdough Starters” from Amazon at: https://amzn.to/2OIzHAX


Here's a recipe for you today from the new cookbook...


Enjoy!

Note from Missy: I love making sourdough bread and have shared my experience here. But one thing that's tough for me is to throw away the starter as I'm making room to feed it (since I don't bake weekly). So it's wonderful to have recipes to find ways to use that "discarded" starter! I bought my copy and can't wait to get started once it releases October 1st!

Thanks to Carroll for visiting today! 


Carroll Pellegrinelli has been baking for as long as she can remember. Under her mother’s guidance she began creaming her butter and sugars as soon as she could reach the counter. A few years later, in an effort of self-preservation, her father took up bread baking. He found that kneading dough alleviates work-related stress. Carroll soon followed suit and began baking bread too. For almost 20 years Carroll wrote about Desserts and Baking for About.com, which was owned by The New York Times. Combining her love of food and travel, Carroll wrote the first book in a series of adventure travel cookbooks: Travel with the Lee Girls, As they Shop and Eat Their Way Through the South, New Orleans. The book is available on Amazon in paperback and in e-book at https://amzn.to/2DKkln4
Her latest book is a cookbook called: Starter Sourdough – The Step by Step Guide to Sourdough Starters. This book can be found at: https://amzn.to/2OIzHAX

Friday, June 21, 2019

Another Cooking Class! Sourdough Bread

Missy Tippens

I got to take another great cooking class at Cook's Warehouse last week! This time, I learned to make sourdough bread with chef Sarah Dodge. It was not a hands-on class this time. It was more of a demo so she could show us some of the major steps and also to share her recipe. She took time to walk through all the steps with us and explain little details that she has learned through her baking experience.

Then she shared some sourdough starter with each of us! This bread isn't made from yeast that you buy at the store. The ingredients are only flour, water and salt. The fermentation comes from wild yeast and bacteria that are in our environment and on our skin. Pretty amazing!


When I got home from the class, I fed the starter with 150 grams of water and 150 grams of flour. She recommended several local mills for the flour. However for beginners, King Arthur flour is very consistent in its protein content.


I fed my starter once and hoped to start making bread that night. But it failed the "float test," where you put a spoon full into a cup of water. If it floats, it's ready to use. Mine wasn't ready, so I fed it a second time late that night. Because the next day was Sunday and I knew I'd be gone most of the day, I put the starter in the fridge after I fed it.

The next afternoon, I took the starter out and let it warm for a bit. I've discovered that my microwave (which is built-in above the oven) is a perfect, warm place! This time, it passed the float test!


Let the baking begin!

For a recipe, go here: The Kitchn by Emma Christensen. It's almost exactly the same as what our teacher shared in class. (I don't feel free to share her recipe here since it was part of a paid class.) I will say that our teacher uses a mixture of bread flour and all purpose flour in the baking (not the feeding). About 60% AP flour. I hope to try incorporating whole wheat flour next time I make it. I'm a wheat bread lover!

During this stage, you let the gluten build and the flour hydrate. It's called autolysing. I realized later that I didn't let my dough sit long enough before adding the salt (which slows the process). So I'll do that for longer next time.

Several of the steps involve folding the dough and letting it rest. I just did it in a bowl and covered it with plastic wrap so it wouldn't dry out. It does not double in size like when you make regular bread, so don't worry when that doesn't happen! The dough was still very wet at this point and didn't expand much at all. I feared it was dead but kept going! LOL


After all the folding, you dump it out on the counter to rest. You'll actually see the edges start to relax. Then you do a last folding from all directions that makes a seam in the bread. When you put the bread in a proofing basket, that seam stays up (which will make it be on the bottom once you put your loaf into the pan to bake).

This was my dough resting.

Here's my dough in the proofing basket. These also come with linen liners which can help absorb some of the extra moisture. I had hand washed mine (it was new and smelled like chemicals), so I couldn't use it. I ended up doing a little research online and read a recommendation to flour the basket with rice flour. I did that first. Then, like my teacher Sarah, I also coated it with cornmeal.


Here is my loaf proofing. This was like 1 am, so I put it in the refrigerator to start up again the next day.

Then next day, I took the basket out to warm up. I put it in the warm microwave for about an hour. It seemed to poof up just a little. (I still feared it was DEAD!)


Then I pre-heated the oven with my Dutch oven inside. Then I sprinkled the pan with cornmeal. Then I dumped the loaf into the hot pan. It came right out! It didn't stick to the basket, which was a huge relief.


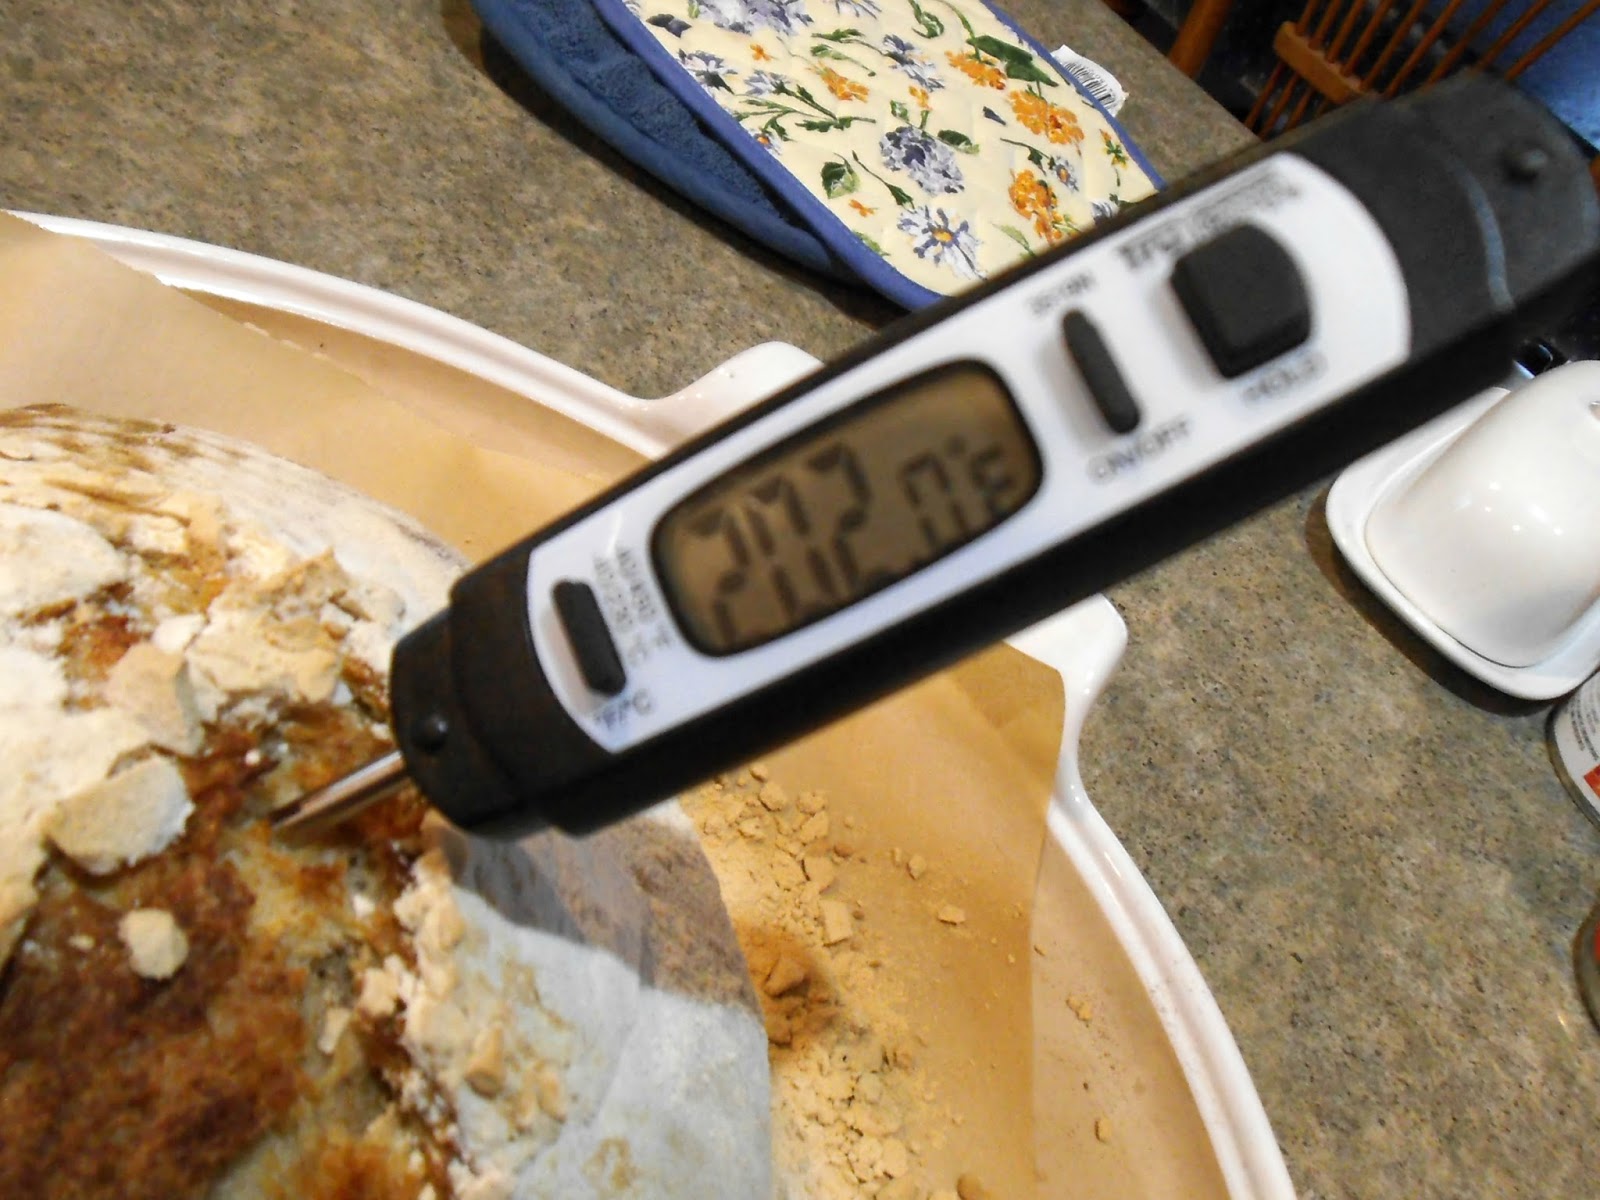
I scored the loaf in a single deep cut lengthwise and two shallower side cuts (for a round loaf, she does a pound-sign). Then I baked with the lid on for 20 minutes. Then took the lid off and baked 20 more minutes. However, from the recipe I shared with you, it sounds like you might want to bake it longer. Mine was rather "blond" compared to photos I saw online and was a bit difficult to cut. So maybe baking longer would help with that.


Here's the finished product!


See those nice air bubbles?! My yeasties and bacteria WEREN'T DEAD!!

Everything I read said to let it cool well before cutting. Who in their right mind can resist warm bread, I ask you??!!


We had it still warm and slathered in butter. Oh, y'all, this was sooo good. It was a lot of work, but I decided it was worth it. I'll keep feeding my starter (once or twice weekly if kept in the fridge). And I hope to maybe bake monthly. If you try it, be sure to let me know how it turns out!


www.missytippens.com

Monday, October 31, 2016

Sourdough, Part 2

A couple weeks ago, I shared about my newest baby - sourdough starter from scratch!

If you missed that post, go here to read all about it, then come back for part 2.


My starter is still going strong. I feed it every day - 1 Tablespoon flour and 1 Tablespoon water.  About every four or five days, I sterilize a new jar and transfer half of my starter to the new jar, along with 1/2 cup flour and 1/2 cup water.

The other half? It's time to make bread!

I've tried two recipes so far. The sandwich loaf is still in the experimental stage.


The flavor is wonderful! But the texture, rising and appearance? Well, we're still working on it.

The other recipe I tried was an artisan type bread, similar to the one Mary Jane made a few weeks ago. You can read that post here.

My recipe is a little different, and so is my method.

The lesson behind that? Baking bread is a personal thing. Very right brain. Try both of our methods and see which one you like better!

Artisan-Style Sourdough Bread

First of all, early in the morning or even the night before, feed about 2 cups of starter with an additional 1/2 cup flour and 1/2 cup water. Set the jar in a warm place and let it work for at least six hours. You can see that my 2 cups increased to about 3 1/2 cups. The amount the starter increases depends on so many factors - temperature, humidity, how active your wild yeast beasties are... So don't sweat it if you have more or less starter than what the picture shows.

Next, get out a big mixing bowl. Put in three cups flour and 1 teaspoon salt, and stir until blended.


Add the starter and 1 Tablespoon honey (yes, the wild yeast loves sweets!) and mix it together. Add additional water as need  - up to 1/2 cup or so - until all of the flour is worked in and the dough is the consistency of biscuit dough.


Cover the bowl (I use the plastic lid that came with the bowl), and leave it on your counter.

OR, if the house is chilly, heat your oven slightly - just enough to take the chill off - then turn your oven off and set the bowl inside with the door ajar.


Let the dough rise 30 minutes, then knead gently and envelope.

What does that mean?

First of all, you have to treat your wild yeast dough very gently. It won't stand for a lot of punching, pommeling, pulling, or anything else you might do to another kind of bread dough. Gently pat and coax it into a rectangle shape on your bread board.


The dough will be sticky, so go ahead and use extra flour to keep it from sticking. I also use a spatula to lift and fold it.

Next, fold the rectangle in thirds, like a letter, and then fold it in half.

Spray your mixing bowl with cooking spray, lay your dough in the bowl, and spray the top of the dough (to keep it from drying out).


Let the dough rise for about 45 minutes, then repeat the envelope procedure.

Let the dough rise for another hour, and turn it out onto your bread board again.

By this time, you should notice a change in the texture of the dough.

Now is the fun part. Line a colander with a floured towel. Shape the dough into a boule (turn the dough in on itself to form a ball with a bit of a belly-button) and place it gently into the colander.


Let it rise for two hours.


Doesn't it look sweet?

And now it's finally time to bake the bread!!!! Preheat your oven to 400°.

But wait - we don't want to cause the beautifully risen loaf to flatten!

Here's how I transferred the loaf to my baking sheet.

First, I covered the colander with a piece of baking parchment.


Then I put a baking sheet upside down over the parchment.


Turned the whole thing over...


...then removed the colander and towel.


Ready for the oven! Put the pan in the oven with some moisture. You can put a pan with water in it on the lowest rack of your oven, or you can spray the loaf with water.

If you have a baking stone, preheat the stone in the oven, and slide the baking parchment and bread off the baking sheet and onto the stone when the oven reaches the right temperature.

Bake the loaf for about 40-45 minutes, or until the internal temperature reaches between 200° and 210°.


Of course, the hardest part is waiting for the bread to cool enough to slice it! But wait at least 10 minutes. The longer, the better. If you can stand it, wait until the bread is completely cool.


I couldn't wait until it was cool, but that's okay. It was fabulous. And without that chemical "tang" of commercial sourdough breads. Yes, you can taste the sour part, but it isn't unpleasant or overwhelming. Just what I was hoping for!

And this recipe came together just in time for cold winter evenings. Even the buffalo know our sunny days are numbered. This guy has on his winter coat!


Once I get the sandwich loaf recipe the way I like it, I'll share that one here at the Cafe, too!

What about it? Do you think you'll try making sourdough from scratch?


Jan Drexler loves her family, her home, cooking and just about anything made by hand. But she loves her Lord most of all.

Stop by Jan's website to learn more about her books: www.JanDrexler.com

Monday, October 17, 2016

Sourdough Starter, Part 1, Take 2

Jan here, and I am just about bursting with excitement!

No, it isn't a new book release, or a cover reveal, or even a new member of the family....


It's sourdough starter.

I made it. All by myself (with a LOT of help from God, and a little help from friendly wild yeast beasties).

If you go here, you'll read about my last attempt at making sourdough starter from scratch. In spite of my enthusiasm, it was a complete failure.

But this batch has been going strong for about three weeks now, and I've already made some loaves of bread with it!


Don't worry - I will share bread recipes with you, but not until I've experimented a bit more.

Today we're going to concentrate on the starter. If you start yours today or tomorrow, you'll be all set to make bread when I share that recipe next week!

My first step in making my own starter was to figure out what went wrong the last time. It took months to realize that my grain mill was the culprit.


Don't get me wrong! I love my grain mill, and I'll continue buying whole grains and grinding them for my baking.

But this puppy heats the rye flour just a bit too hot as it mills the grain. The wild yeast beasties don't like that.

In fact, they hate it so much that they...well...die. :(

And that is bad because sourdough is flour, water, and wild yeast. If you kill the wild yeast in the process of making the sourdough starter, you end up with yuck.

We don't want yuck.

So once I figured out the problem, I bought a bag of this:


 This is the key. Cold milled flour!

And why rye flour? Because for some reason the wild yeast beasties love rye. It must be their chocolate or something. You can use other flours when you make your breads, but to begin your starter, you really should use rye.

So now that we have the ingredients, let's make starter.

Sourdough Starter

ingredients:

rye flour
water
time

That's it. Nothing fancy.

I feed my starter in the morning when I'm making my tea.

Day 1: Sanitize a quart canning jar, small glass bowl, or other glass container by pouring boiling water into it. Pour out the boiling water and add 1/2 cup cool water and 1/2 cup rye flour. Stir, then cover with a towel, cheesecloth, or other clean, porous covering. Set it in a warm place and ignore it for a day.

Day 2: Sanitize a second quart canning jar or other container. Add 1/2 cup cool water and 1/2 cup rye flour. Stir. Stir the 1st jar of starter and add it to the new jar, and stir the starter, flour, and water together. Cover and set in a warm place.


(How warm? I put mine on the kitchen counter next to my sink.)

Day 3 - 7: Repeat Day 2.

Now your jar should be pretty full. And after six or seven days, your starter is ready to use. It should smell yeasty and slightly sour.

It should also be brown (not green or gray or black!) (or yellow or pink!). If it is any color but brown, throw it out! Your wild yeast beasties have been taken over by the bacteria storm troopers and you need to start over.

It should also be a little bubbly. Pleasantly bubbly.

If your starter looks like this, rejoice!


Keep feeding it daily. If you forget a day, don't sweat it. Your wild yeast beasties will keep doing their thing. But you do need to keep feeding it or else the yeast will get weak and the bacteria storm troopers will start moving in.

Once your starter is established, though, you can feed it less. Reduce the daily feeding to 1 Tablespoon of flour and 1 Tablespoon of water. And you only need to change the jar a couple times a week.

Or, once your starter is established, you can also keep it in the fridge. The yeast beaties (now tamed and named) will slow down their wild growth pace. They'll only need to be fed a couple times a week.

I keep mine on the kitchen counter so that it continues to grow. I use it about once every four or five days.

Next week - recipes to use your starter!!!


And then there is this:


"Pretty" is not strong enough of a word to describe the Badlands of South Dakota.


Barren doesn't do it, either.


Other-worldly?


Awe-inspiring. Definitely.


I'm beginning to research a story set here, at the edge of the Badlands. Rancher brothers and a legacy of faith and family.

Speaking of the ranching legacy, some ranchers need our prayers.


This prairie fire was huge Sunday afternoon during our drive through the Badlands. A "big bad boy" one person said, and movin' fast. If you can get an idea of how big it was - I took this picture from between 40 and 50 miles away from the fire. I have rancher friends who were in the path of the fire, but even though pastures and fence posts, etc. burned, their home was saved, praise the Lord.

And next week, sourdough part 2!


Jan Drexler loves her family, her home, cooking and just about anything made by hand. But she loves her Lord most of all.

Stop by Jan's website to learn more about her books: www.JanDrexler.com