Saturday, February 7, 2015

Epic , Quick, and Easy Thai Chicken Peanut Noodle Dish

Hello, everybody! The Fresh Pioneer is back and I've got a super quick Thai dish to warm up your February weekend! (And if you add extra red pepper flakes, it could reallly warm up your night.)


 First things first:
1/2 cup fresh peanuts
1/2 cup green onion
one lime
1 can water chestnuts
1 cup sliced bell peppers
2 tsp Thai seasoning you can find in the produce are of your grocery store
1 tsp dry garlic (or fresh)
 1 cup peanut sauce (I'll also post a super quick recipe to make your own sauce, but I had this in the cabinet so, I opened it up. It was pretty tasty!)
1-2 lbs pounds of sliced chicken breasts
Your favorite Asian noodles
The peanuts can be found in bulk and keep pretty well.
 I'm not a fan of water chestnuts but my kids are so... here they go.
 I just love this stuff. I've used it in so many dishes since I bought it and it only needs a few teaspoons. All natural and certainly saves money when I was buying this ingredients fresh, in the middle of winter!
 I love this stuff. My husband prefers fresh garlic for his home salsas so we always have that on hand, but for pan frying, I really like the way the dried garlic gives off a nutty aroma. YUM.
 OK, here's a quick peanut sauce recipe if you don't have a bottle of this on hand:

 1/4 cup creamy peanut butter

 1/2 cup chicken broth

 1/4 cup lemon juice

 1/4 cup soy sauce

 4 teaspoons  hot  sauce 
Whisk all those together in a saucepan on medium until the peanut butter is thoroughly incorporated. 

 OK, here's the chicken. (Sorry, Kav. Gruesome, eh? Imagine this is tofu, which I've had in this dish and it's super tasty.) Slice and brown in a pan until cooked through.
 Slice peppers, green onions and any other veggies you'd like to add. I like onion but one of my kids asked me to skip it and so i did, this time.
 Take the chicken from the pan and add a few Tbs of oil, dried garlic, and the Thai seasoning. Let it heat up and then add the peanuts, bell peppers, green onions. water chestnuts, other veggies (I had some snow peas in the fridge so I added those). Stir on medium high heat until bell peppers are sauteed.
 Add the cooked noodles, the diced and cooked chicken. Add the peanut sauce and toss gently.
Serve with a slice of lime and a small bowl of red pepper flakes if anyone wants to add extra zing. Since we have several kids who hate spicy food, and several who love it, it's best to serve most of the heat on the side.

  OK, I hope everyone is having a warm and productive February! I'm almost done with my latest book and I'm so excited to reveal it...  as soon as I can!

Friday, February 6, 2015

The Best Ever Ham and Cheese Sliders!

Missy Tippens, The Belle, here. My kids came home from a Christmas party at a friend's house and raved about these sandwiches. So I texted their friend's mom for this recipe. And yes, it's definitely something to rave about! I loved it.


NOTE: This recipe calls for letting the sandwiches, once assembled, sit for 4-24 hours! And no, I didn't see this note until I had hungry kids waiting to eat. :)

Ingredients:
1 package Sweet Hawaiian Rolls
1 lb. deli sliced ham
6 slices Swiss cheese
½ cup butter melted
3 Tbs. Worcestershire sauce
2 Tbs. Mustard
2 Tbs. brown sugar
¼ ts. onion powder

My friend sent me an Instagram photo of the ingredients, and it came from this website: http://joyfulmommaskitchen.com/hawaiian-slider-sandwiches/

I baked these on a jelly roll pan.


Cut the rolls in half. Put bottom half in the pan. Layer the bread with the ham and cheese and then put the tops on the rolls.

Whisk together all other ingredients and spread over the top of the sandwiches.


Like I said, the recipe called for covering with plastic wrap and refrigerating for at least 4 hours, or even overnight to let the liquid soak in.

So being the REBEL that I am (ha!), I went ahead and baked at 350 degrees for 15 minutes. They still turned out YUMMY! Golden and buttery and gooey with melted cheese! You need to try these for your next party.


www.missytippens.com

Thursday, February 5, 2015

Cookies and Cream Icing

FIRST: I finished a book this week and sent it in to Love Inspired, so that's REASON TO CELEBRATE in author-world!!!!! And I'm working on a delightful novella, but that's not pertinent to today's post!!!! But it will be pertinent to a later post, no doubt!


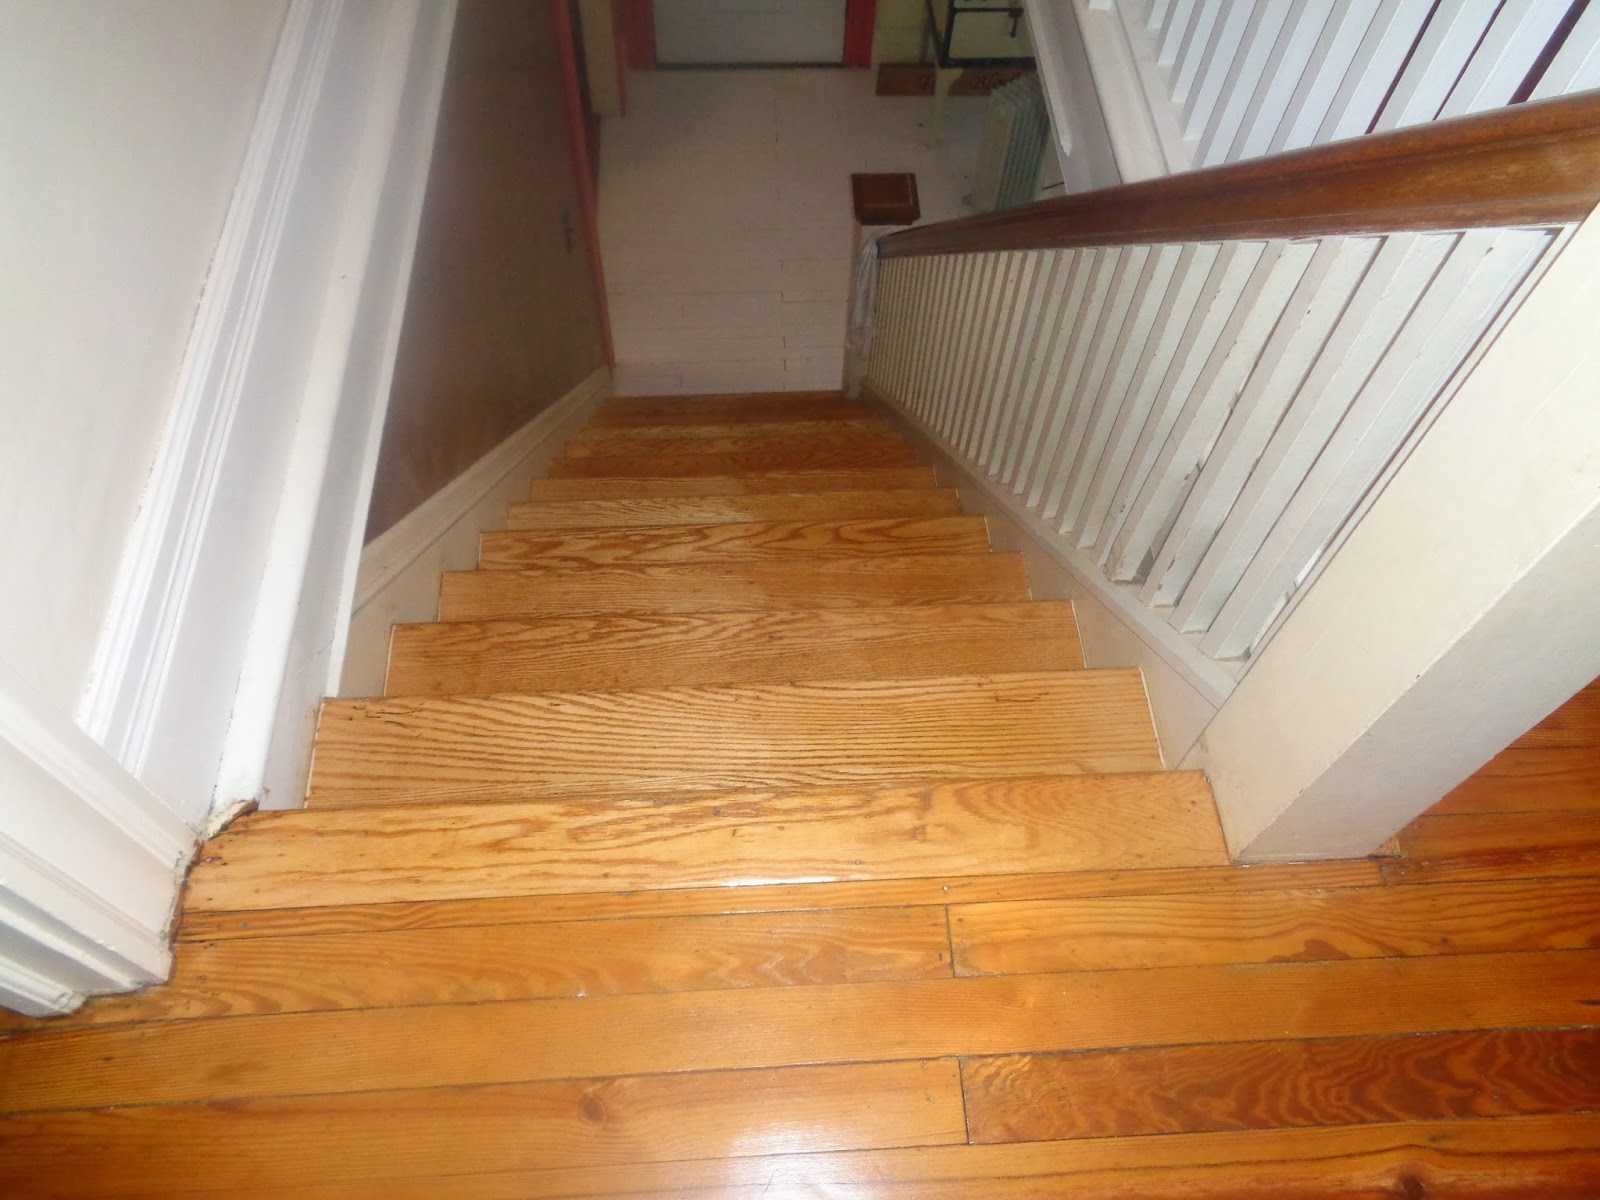
The irony of the snowman on the soapstone stove is not lost on me. And it's mid-January... we had to let the stove burn out because we were having the old stairway (remember when I ripped up that old carpet last year??????) and a bedroom, and closet and second floor landing refinished....

Here's the old look:


This is from the top of the stairs, looking down.  And this is the bedroom floor:


And then this is after the sanding was complete, without a finish:

The bedroom floor:

 The closet floor:


The stairway. What an amazing difference, right????? Crazy fun!


And then these are the finished product after a coat of sealant and then two coats of polyurethane:


I have been waiting 25 years to unearth these 160-year-old floors. I'm over the moon!!! :)

But BACK TO FROSTING!!!!

This was to-die-for.

I do not use that term lightly.

Okay, that's a lie, I DO use it lightly, but in this case the terminology is not over-the-top! It's just plain, spankin' true!

I started simply by making a Duncan Hines dark chocolate cake. Instead of letting it cool naturally, I stuck it right in the freezer for 45 minutes when it was done baking. This negates that out-of-oven cooking time that tends to dry cake and leaves your cake SUPER MOIST and delicious.


I started out looking online for a cookies and cream icing. I knew what I wanted because I worked in a commercial bakery for several years until I'd sold my third book... by then I figured that if someone was crazy enough to buy my work, they'd probably be crazy enough to buy MORE OF MY WORK!!!!

So then I could go down to two jobs, not three! <<BONUS!!!!>>

Anyway, the first recipes I saw wouldn't fit the bill. They were simply buttercream icings with crushed cookies thrown in.


(Now I know what youse are doin', you're scratchin' your heads and wonderin' why that was WRONG.... but it's all in the consistency. I wanted the taste of buttercream and the consistency of "satin" frosting, the chemically induced, gas-inflated frosting used in commercial bakeries. People that LOVE, LOVE, LOVE satin icing actually like the chemical aftertaste, like the flavorings for some icee drinks/slushy thingies. But I digress (like usual)...

Cookies and Cream Icing  (adapted from recipe here: http://www.makinghomebase.com/cookies-and-cream-frosting)

1 cup butter, softened
3 cups confectioners/powdered sugar
2/3 cup whipping cream
1 tablespoon vanilla

2 dozen crushed Oreo cookies (any flavor, depending on how you want your frosting to taste)

In large mixing bowl, whip butter until very soft and fluffy, several minutes.

Add confectioner's sugar one cup at a time, whipping butter and sugar together until light and fluffy each time. When all three cups have been added, pour in the whipping cream and the vanilla. Mix on low until liquid is incorporated, then beat on high until frosting is whipped smooth and light and holds a peak.

Crush the Oreos (You can use less, but I like a lot of cookie flavor in the frosting, like the commercial frosting makers use) into powdery pieces. Blend into frosting, use to frost cake, cupcakes or as a filling.


I cut the cake in half, then cut each half in half through the middle so I could have two layer cakes. I layerd the frosting between the layers and then topped the second layer with frosting too. A-stinkin'-mazing!!!!

I didn't go for aesthetics this time because kids and parents were coming in and they loved it without the beauty awards! In a perfect world I'd have swirled the frosting on and added an Orea in the center! But I promise, even in our non-perfect world, you will love this frosting!


Wednesday, February 4, 2015

Laura Ingalls Wilder Buzz: Surviving the Wait

This week in the Carolinas, some homes are still obsessed with Frozen. My granddaughter still insists on being called Elsa. It's been crazy up and down cold while my friends in the Kansas and Nebraska had the 60s and 70s before a major snow storm. People are still talking about the Super Bowl and the dancing shark at half-time who couldn't keep in step. 

But in the Steele house, it's all about Laura Ingalls Wilder. Now we've talked about Laura and her books here on Yankee Belle.  Jan reminded us there are still devastating Long Winters in her October Blizzard Macgyver That Sauce post  .  I followed up with a discussion on all the food featured in Little House books in Book Food: The Little House Connection .
My two favorite Little House books: The Long Winter and These Happy Golden Years.
Surely we don't need to revisit the topic!  

YES, we do!!!!!!  And yes, I'm jumping up and down because Laura Ingalls Wilder is a blockbuster hit yet again, thanks to the South Dakota Historical Society's runaway best-seller, Pioneer Girl: The Annotated Biography, edited by Pamela Smith Hill. A book fans have anticipated for years is finally out.

The book is coffee table sized: 9 inches by 11 and 1.5 inches thick.

But there's a problem. The buzz has exploded for a book with an original printing of only 15,000 copies, 4000 already earmarked. I despaired. Then second printing of 15,000 and the book I ordered in August showed up last week. The buzz is humming like an upset hive of bees (yep, a little boy tangles with one of the Little House books). The third March printing of 45,000 copies and a fourth printing is on the horizon.  Folks are in a frenzy waiting for their book to show up.

A once in a life time book and we are either waiting for or celebrating its arrival. Ack!

How to celebrate now that it's here? and for my friends who are waiting, How to survive until the book arrives?  You can go back and read the original series but the best survival manual for those who cook is the Little House Cookbook. Not only does it has a lot of beloved snippets from the Little House book series, but it is the perfect cookbook for those who need to feed their families food that is as fresh and natural as possible.  Remember, this was plain food in the days before icky chemical preservatives and food additives no one can pronounce.

Such a fun book even if you don't like to cook.

I picked up some bison, thanks to a coupon. I figured since Little House on the Prairie talks about Pa living on the land belonging to Osage Indians and Pioneer Girl details the reality of the situation, it would be a nod to the real life and times of both the Ingalls and the Native Americans who added drama to Laura's books.  

Why yes, we have bison in North Carolina.
I decided to adapt my all meat meatball recipe and make a glaze out of items in my pantry. After all, it's Long Winter time and food stuffs are scarce.

Since bison is very lean, I added a third of a pound of ground pork (a nod to the pig butchering in Little House in the Big Woods) to the pound of bison, one egg to bind the meatballs and keep them gluten-free. I also didn't add seasoning to keep them "neutral" so I could freeze some and pop them into spaghetti sauce and such.

I formed the balls and baked them at 400 degrees in a pan lined with foil to keep mess to a minimum and cooked until brown, about 12-15 minutes.


After putting them in the fridge overnight to cool down, I went off to read more Pioneer Girl and my cookbook to see what sauce Laura might whip up.

Lots of meatball sauces contain ketchup and mustard. Pioneers ate tomatoes but most likely they were cooked. So I was good there. Same with spices like mustard. I added maple syrup, imagining they may have carried a jug as they left the Big Woods.

I used equal amounts of all three but no more ingredients.  The real Ingalls were far more strapped financially than the fictional books let on, even though we readers knew they had their struggles. I heated the combined ingredients, stirring until blended.

After reheating the meatballs, I poured the warm sauce over the hot meatballs, stirring until coated. Voila.
Oops, someone has been snitching the meatballs.
Hopefully Ma Ingalls approves. 

So are you waiting to get Pioneer Girl in your hands? Are you surprised by Pioneer Girl's place on the top of the best seller lists? Have you eaten bison meat or tried other pioneer themed foods? Let's talk.


Tuesday, February 3, 2015

Perfect Mashed Potatoes - The Ultimate Comfort Food

You've probably heard me mention mashed potatoes hundreds of times over the last few years. How my boys are meat-and-potato guys, and their potato of choice is the mashed variety. However, other than sharing a lighter version of the comfort food staple here, I've never told you how I make my mashed potatoes. Because there are mashed potatoes and there are perfect mashed potatoes. And  though I rarely eat them anymore, I sure know how to fix 'em.


The first thing you need for this recipe is, well, potatoes. Take your pick. Russet, Yukon Gold, red... Whatever you prefer. For the most part, it's usually good old CHEAP russets for me. 
On this occasion, I cut up three large potatoes and three smaller ones.

While the potatoes get top-billing in this recipe, it's really what goes into them that makes the difference.
I like to add butter, cream cheese, half-and-half or milk and salt and pepper.
On this occasion, I decided to get fancy and add some shredded sharp cheddar, too.

Since my boys complain when there's skin in their potatoes, I peel them, but you are more than welcome to leave the skin on, if you prefer. If it were up to me, I'd leave it on, but since I'm not the one eating them, I let them have their way. Whether you peel or not, cut your taters into somewhat uniform pieces. You want them to cook evenly, so they need to be roughly the same size.

Put the cut potatoes into a large pot and cover with water by one to two inches. Add a teaspoon (or more) of salt and put them on the stove top on high heat and bring to a boil. Here's a little tip. If you lay a wooden spoon across the top of the pot, your water won't boil over. And if you've ever had to clean baked-on potato foam off of your stove, you know what a mess that can be.

Cook until potatoes are tender. Don't over cook them or they'll get mushy. We're looking for mashed, not mushy potatoes. Then drain off the water.
These are perfect.

Now add your butter and cream cheese (and the cheddar if you like). For this amount of potatoes, I added about 3-4 tablespoons of butter and 2-3 oz. of cream cheese.

And cover until melted.
FYI, the cream cheese will never actually look melted, but once the butter is gone, the cream cheese will be nice and soft.

Now it's time to mash. How you do that is up to you. You can use a masher, which is what I did for years, but nowadays I just break out my hand mixer. Much quicker and the potatoes get so much fluffier. Of course, you do miss out on building that upper arm strength.
Mix everything together until well blended.

Then add your milk or half and half until you reach your desired consistency. Typically, I use milk, but I had some half and half left over from another recipe, so I thought I'd use it up. Now add salt and pepper to taste and whip some more.

Here's another secret for those who have picky eaters. My kids always used to complain when they saw specks of pepper in their potatoes. So, I started using white pepper. It still adds loads of flavor, but no one can see it. ;)

And there you have it. Perfect mashed potatoes. The ultimate comfort food.

Since my boys like them so much, I usually make enough to have leftovers. I can use them for the next days supper or, I've been told, they make a good late-night snack. 

What's your ultimate comfort food?

Monday, February 2, 2015

Cowboys Coming and Going!

It's Cowboy Time in the Black Hills - one of my favorite weeks around here!


Cowboys rule during the Black Hills Stock Show and Rodeo  - big ones and little ones!

We went to the show on Saturday. The first Saturday is the best time to hit the vendor booths. You can find anything a cowboy might need - 

Chaps and Chinks - 


You know what Chaps are, right? But what are Chinks? Chaps are the long leather coverings for your legs. Chinks are abbreviated chaps. They end about mid-calf. And these are real chaps, not the black leather ones motorcyclists wear. We see enough of those in August!

All kinds of clothing - and believe me, you don't look a bit strange dressed like this around here. Especially during the stock show.


We have little buckaroos having fun while waiting for their dads to finish talking about Quarter Horse stallions...


...and steeds for them to ride.


Belts and boots and hats...


These aren't just any hats. They're custom made, custom fitted cowboy hats made here in the Black Hills. Star of the West Hat Company

Plenty of saddles, bridles, lariats and other horse accouterments, of course.


I even shopped for riding boots. They're on my list to purchase before spring, when I've been promised more rides on my favorite mule, Loretta :)

 And then there are the rodeos. Every day.


These guys were waiting for Saturday afternoon's rodeo to start. Hubby and I will be going next Saturday, when a friend's five-year-old grandson is opening the show by singing the National Anthem.

Five years old.

Good stock runs deep in ranching families.


I thought I'd celebrate the Stock Show by reprising a recipe from a couple years ago. It continues to be a favorite around our house - especially when I use the local, grass-fed beef we've been buying the last two years. I've ordered this year's half-steer already, and just in time. The freezer's gettin' pretty empty!


Jan's Cowboy Chili

Start with about 1 1/2 pounds steak. I like to use round steak, or these little chuck steaks.

They're slightly icy in this picture - being slightly frozen makes the meat easier to handle.

Cut the meat into 1/2 inch cubes, and then prepare the marinade.


Marinade ingredients:
1/2 cup Worcestershire sauce
1/4 cup apple cider vinegar
1/4 cup oil - vegetable or olive
1/4 cup chopped onion
1 teaspoon chili powder
1/2 teaspoon chipotle chili powder
1/2 teaspoon garlic powder


Mix the marinade ingredients together, and then pour over the cubed meat in a plastic bag or glass bowl. Put it in the refrigerator and let it marinate for at least 30 minutes - an hour or two is better.


After an hour or so, it's time to start cooking the chili.

Drain the marinated meat, reserving the onions and meat.

Brown in a tablespoon of olive oil in a large pot, and then add the rest of the ingredients:

2 cups beef broth
2 cans red beans (drained and rinsed)
1 can (14 oz.) tomato sauce
2 tablespoons chili powder
1 teaspoon chipotle chili powder
1 teaspoon oregano
2 tablespoons cumin

Let all this simmer, covered, for an hour or two. Or three. Or put it in the crock pot for a half day or so...
Now, lift the lid and take a whiff. Don't you feel like you're on a cattle drive with the cowboy of your dreams?

Westerns and cowboy stories continue to be favorites among Love Inspired readers, either contemporary or historical. We love the romance, the wide-open spaces, the culture that allows a man to be rough, tough and able to do whatever job comes along - but at the same time be gentle enough to coddle a newborn calf or hold his young son during a nap.

What is your favorite part of cowboy culture?